
Magnet Motor Kit
MMK
Introduction
Electric motors are everywhere; even a computer has electric motors powering its cooling fans and hard disks. Building a simple DC electric motor is a great way to learn how they work, and it is really fun to watch your own creation spin. This page contains instructions for building a very simple DC motor using the materials that come in the MiniScience Magnet Motor Kit.
Scan here for online video
Objective: The objective of this project is to build a simple electric motor from scratch.
In this motor you will use a 1.5 volt battery. Batteries offer a one directional flow of electricity, also known as DC or direct current — that is why this is really a simple DC motor. With this project you can learn and demonstrate the conversion of electrical energy into mechanical energy.
Items Needed
Before starting, verify the content of your kit against the list below.
- Battery holder
- Ceramic disk magnet
- Magnet wire (enamel coated copper wire)
- Safety pins
- Screws
- Wood block
- A pair of pliers, a screwdriver and a sharp knife or craft blade (not included)
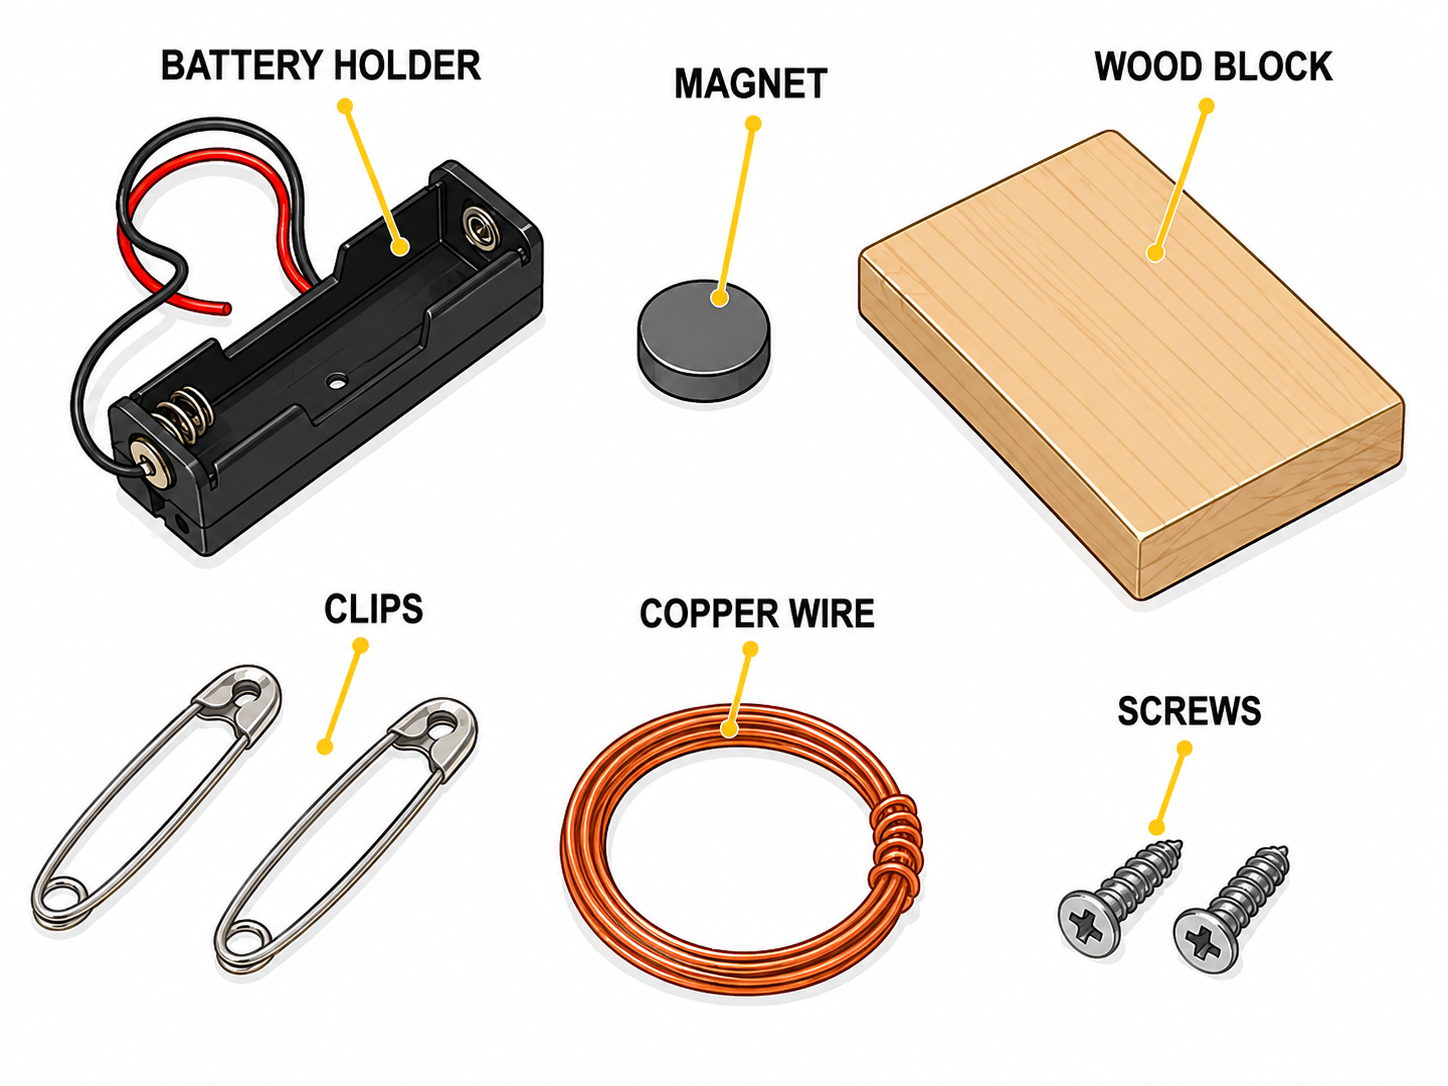
Requires one AA size, 1.5 volt battery (not included). Adult supervision is required when scraping the wire with a sharp knife.
The main components of a simple DC motor are just a piece of magnet wire and a small magnet — almost any type of magnet and magnet wire will work, and all other components can easily be substituted with other materials. This special design is well suited for school projects.
A Science Fair Project
The Magnet Motor Kit may be used for a science project, technology project, display project, or an engineering project for your science fair. Your completed motor will also be an educational tool for yourself and your classmates who need to understand how electrical energy is converted into mechanical energy inside a DC motor.
Assembly Procedure
Step 1 — Wind the armature. Start by winding the armature, the part of the motor that moves. To make it nice and round, wind it on a cylindrical form such as a pipe or a small AA battery. The diameter is not critical, but should be related to the wire size, and ideally should match the diameter of the magnet you are using.
Leaving a couple of inches of wire free at each end, wind 6 to 9 turns around the cylindrical form. Don't try to be too neat — a little randomness will help the bundle keep its shape. Now carefully pull the coil off of the form, holding the wire so it doesn't spring out of shape.
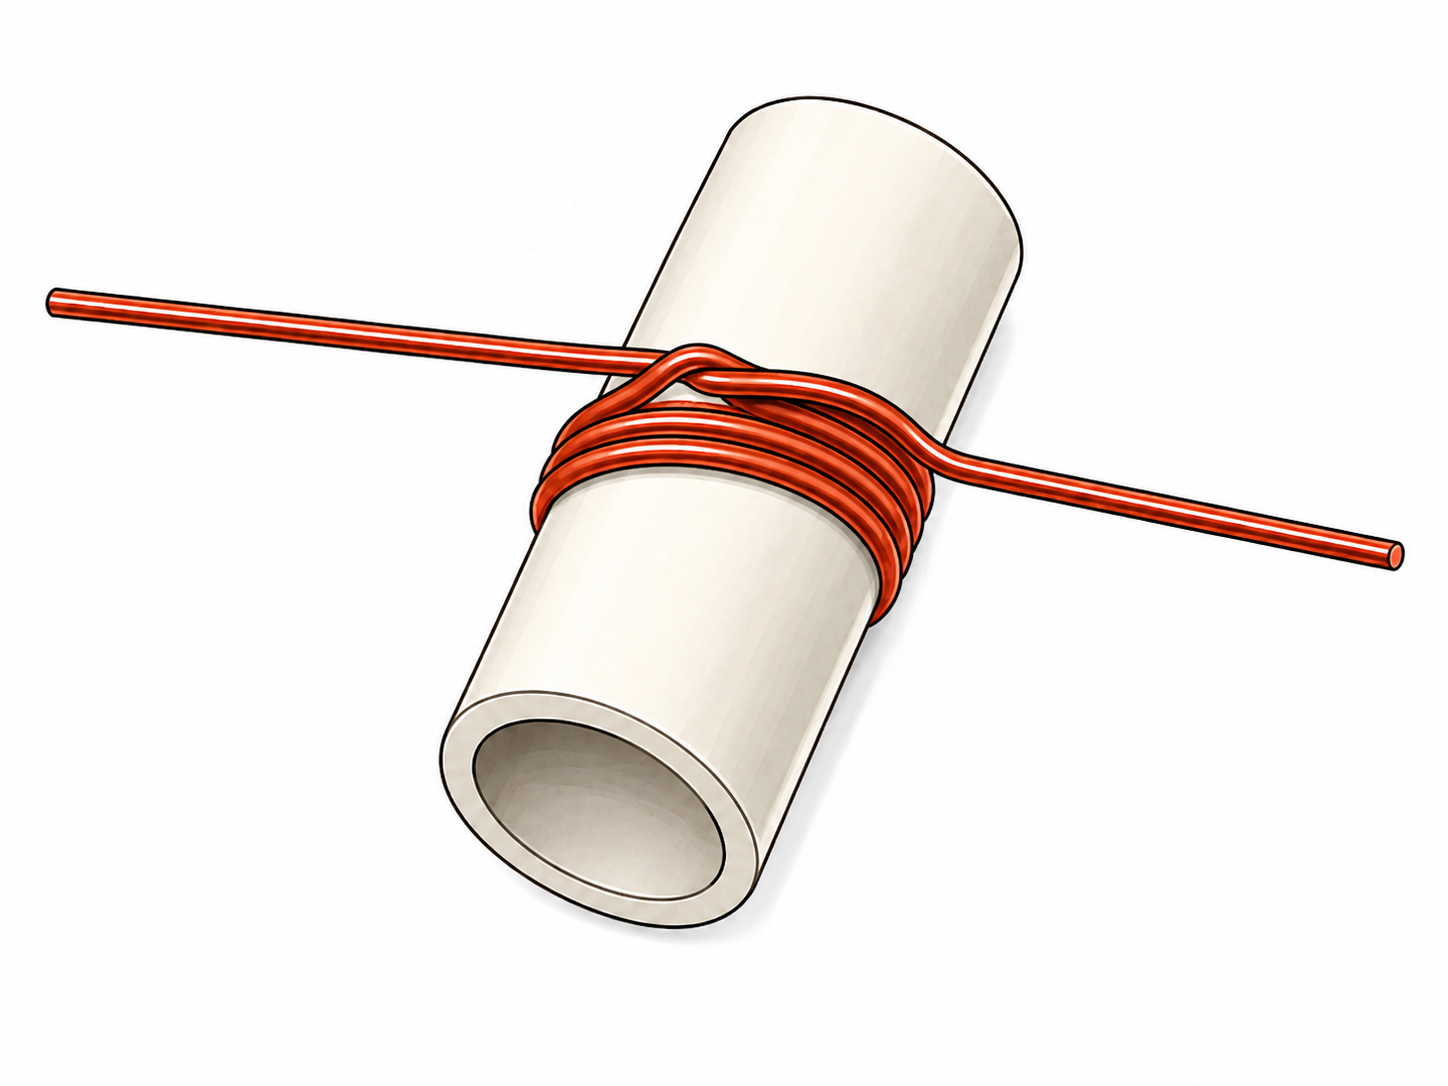
Step 2 — Secure the coil. To make the coil hold its shape permanently, twist the free ends: wrap one free end of the wire around the coil a couple of times, then pass it through and across the loop and wrap a few turns on the opposite side. Make sure the new binding turns are exactly opposite each other, so the coil can turn easily on the axis formed by the two free ends of wire, like a wheel.
If this is too difficult, feel free to use scotch tape or electrical tape instead. The important thing is to keep the coil together, with the two free ends anchored well and aligned in a straight line so they form a good axle.
Step 3 — The secret trick. This is where the secret trick comes in — the small, subtle detail that makes the motor work. It is easy to miss when the motor is running; even people who know a lot about motors may be puzzled until they examine the coil closely and find it.
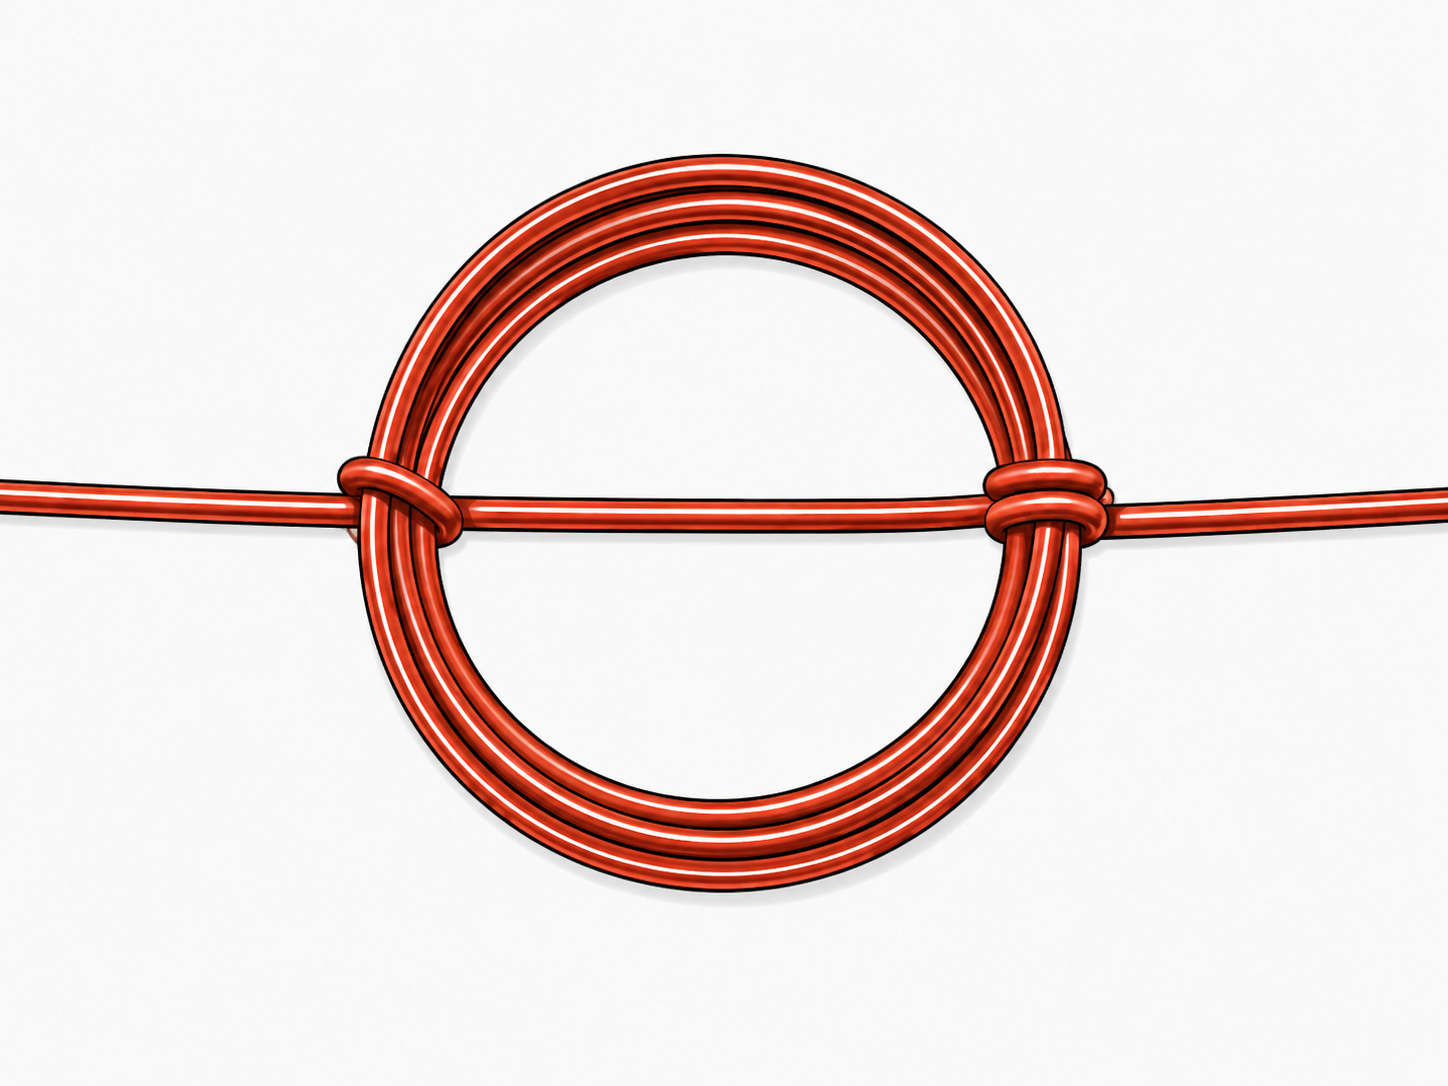
Step 4 — Scrape one wire end. Hold the coil at the edge of a table so the coil stands straight up (not flat on the table) and one of the free wire ends lies flat on the table. With a sharp knife, remove the top half of the insulation from that free wire end. Be careful to leave the bottom half of the wire with its enamel insulation intact — the top half will be shiny bare copper, and the bottom half will keep the color of the insulation.
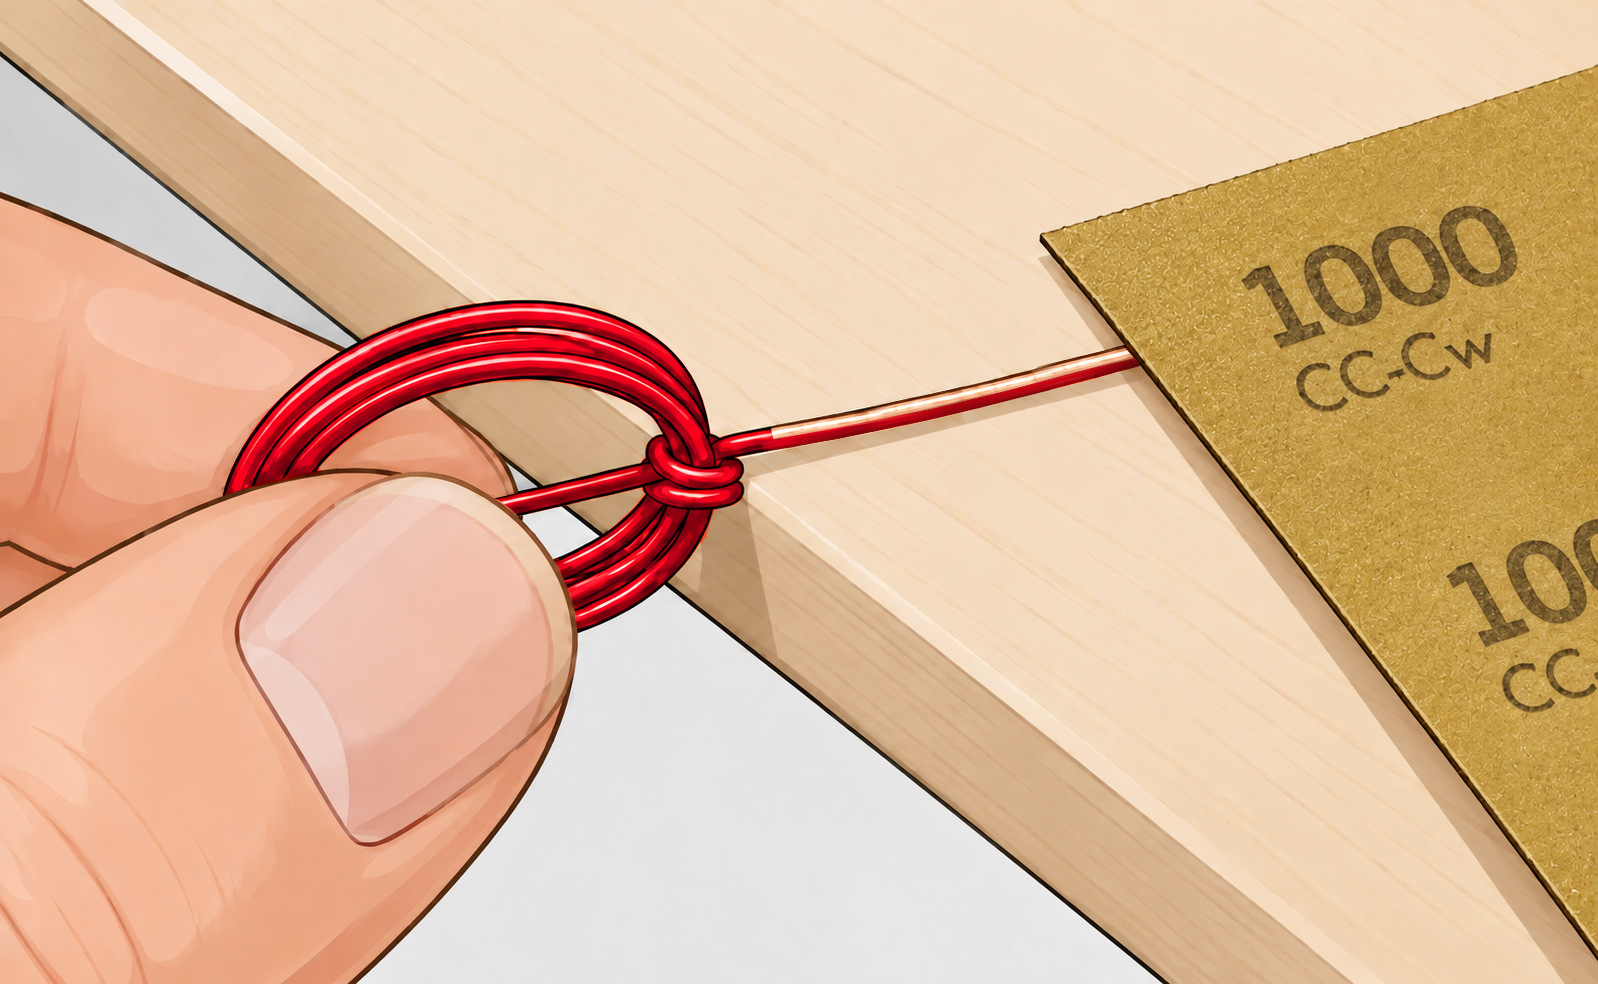
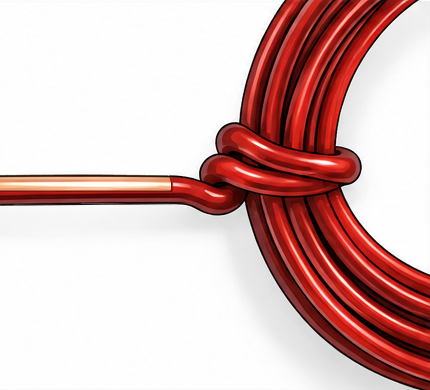
Step 5 — Scrape the other wire end. Do the same to the other free wire end, making sure the shiny bare copper side faces up on both wire ends.
The idea behind the trick: the armature rests on two supports made of bare safety-pin wire, each connected to a terminal of the battery, so current flows from one support into the armature and back through the other support. This only happens when the bare half of the wire faces down and touches the supports. When the bare half faces up, the insulated half touches the supports instead, and no current can flow — this is what switches the motor's current on and off once every turn.
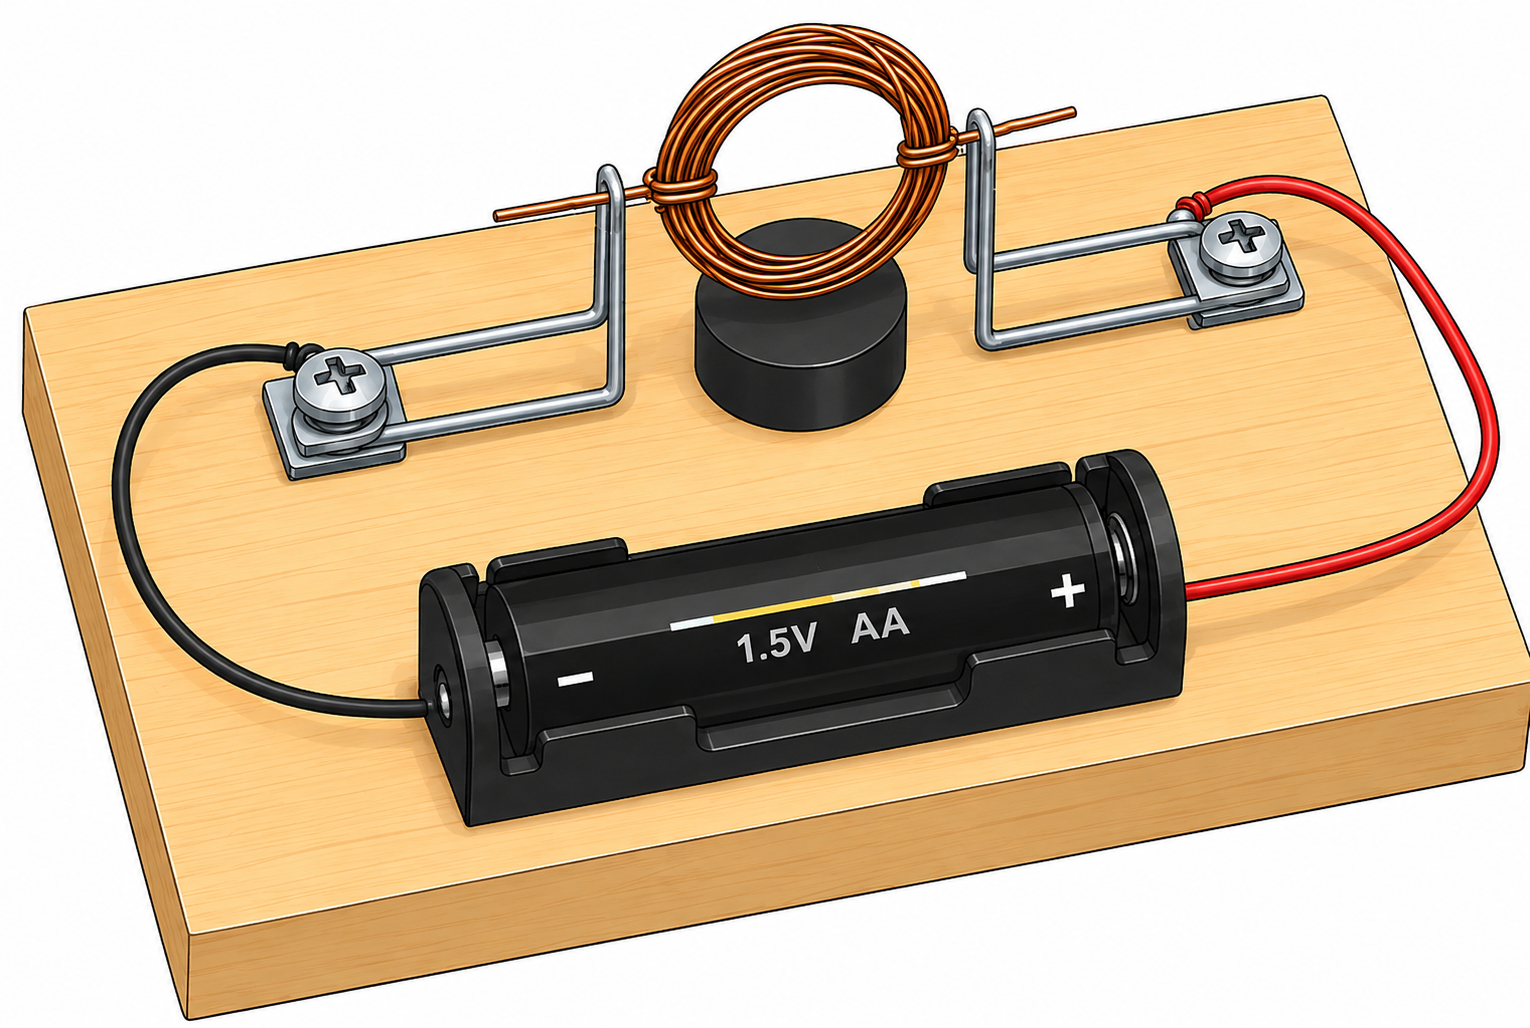
Step 6 — Axle supports. Use a pair of pliers to bend two safety pins from the middle. The safety pins conduct electricity to the armature, while the loop of each pin holds the armature up.
Step 7 — Prepare the base. The base for this motor is a wood block. It makes a good base because it is heavy, stable, and looks good for a classroom or science fair presentation. The block is also large enough to hold the battery.
Step 8 — Mount and wire. Use screws to mount the bent safety pins on the wood block so their loops face each other, about an inch apart. Insert the screws through the lock of each safety pin into the wood, and attach the wires from the battery holder to the two supports. Swing the safety pins apart a little, insert the armature into both loops, then swing them back close to the coil — but not touching it — so the armature can still spin freely.
Step 9 — Battery and magnet. Insert the battery into the holder. Place the ceramic magnet on top of the wood block, directly underneath the coil. Make sure the coil can still spin freely and just clears the magnet. In some kits a toothpick or plastic strip is wedged between the battery and the contact in the holder as an on/off switch: remove it to let electricity flow into the motor, and replace it to stop the motor and save the battery.
Step 10 — Start it up. Spin the armature gently to get the motor started. If it doesn't start, try spinning it in the other direction — the motor will only spin one way once it is running.
Troubleshooting
If the motor still doesn't start, carefully check all the electrical connections. Is the battery connected so one support touches the positive end and the other touches the negative end? Is the bare copper half of the armature wire touching the support wires only at the bottom? Is the armature spinning freely without rubbing against the supports?
If all of this is correct, your little motor should be spinning at a pretty fast rate. Try holding it upside down — the motor should spin in the opposite direction when the magnet is on top instead of on the bottom. Try flipping the magnet over and see which direction the motor spins. If you want a motor with the magnet on the side instead of on top or bottom, make a new armature, but this time lay the coil flat on the table when you scrape the insulation off the top half of the free wire ends.
Additional Notes
Another way to prepare the armature is to wrap the two wire ends around two opposite sides of the loop. This makes one half of the loop heavier than the other, which changes the balance and makes it harder for the armature to spin. If this happens, move one of the ties slightly toward the heavier side to regain the balance. It is important for the loop to be balanced so it can spin freely around its axle.
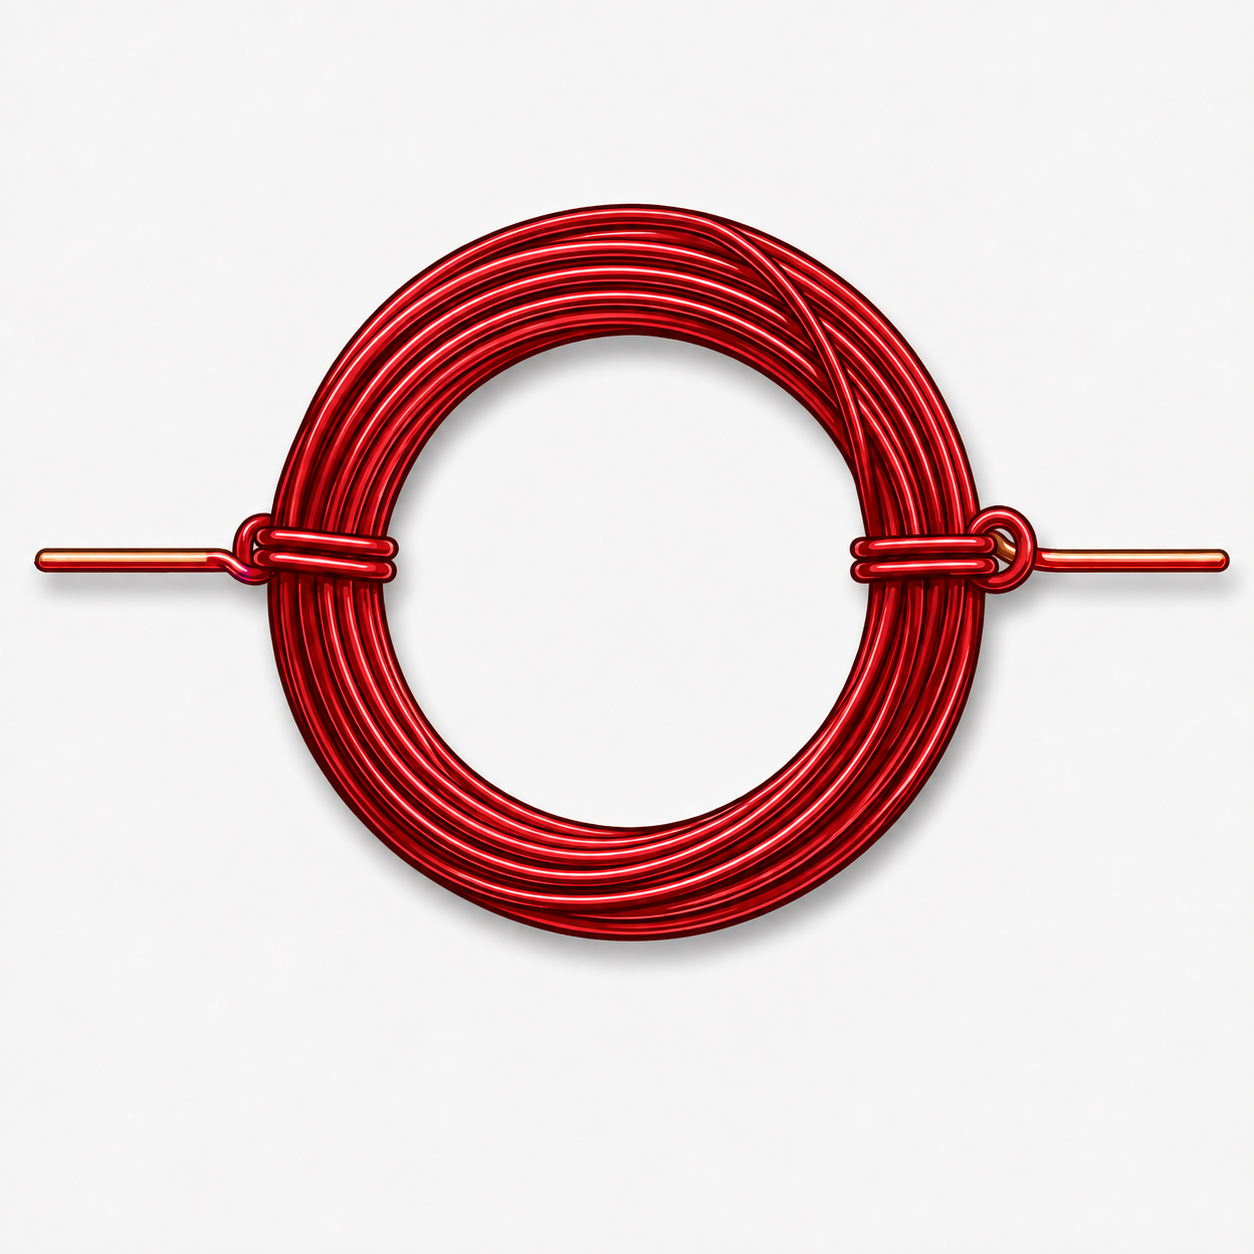
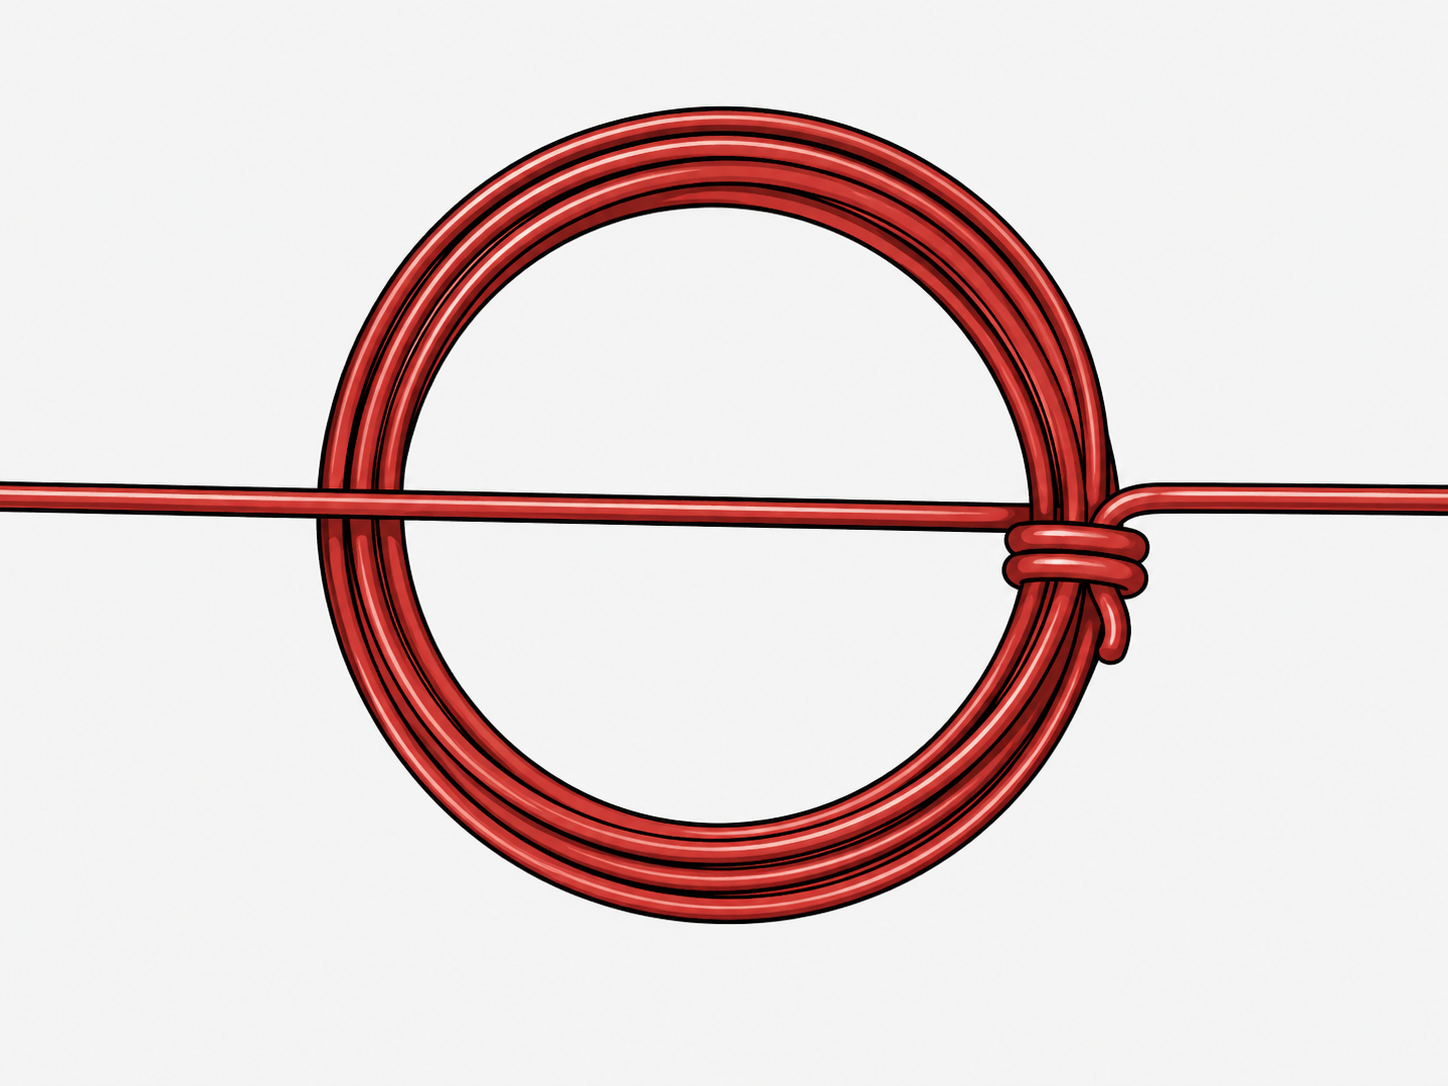
It is not necessary, but some builders wrap a couple of extra turns around the binding turns, threading the wire into the space between the large coil and the small coils that hold it together. This makes for a neat, tight package, as shown below.

Terms, Concepts and Questions to Start Background Research
To do research in this area, look into these terms and concepts:
- Armature or rotor
- Commutator
- Brushes
- Field magnet
- Electromagnet
- The operating principles of a DC motor
More advanced students will also want to study:
- The right-hand rule
- Induction
- Back EMF
Science Project
Research question 1: How does the number of turns in the armature coil affect how fast the motor spins?
Sample hypothesis 1: I hypothesize that a coil with more turns will produce a stronger magnetic field and spin faster, up to a point where the extra weight of the wire slows it back down.
Research question 2: How does the strength of the magnet affect the motor's speed?
Sample hypothesis 2: I hypothesize that a stronger magnet will make the motor spin faster, because a stronger magnetic field exerts more force on the current flowing through the armature.
Build several armatures with a different number of turns (for example 6, 8 and 10 turns) and keep everything else the same. Spin each one and estimate or measure its speed, for example by counting how many turns it completes in 10 seconds.
| Turns in coil | Turns completed in 10 seconds |
|---|---|
| 6 | |
| 8 | |
| 10 |
Sample data table (Values are not real):
| Turns in coil | Turns completed in 10 seconds |
|---|---|
| 6 | 34 |
| 8 | 41 |
| 10 | 29 |
Analysis and Reporting
Review the speed you recorded for each armature and discuss how the number of turns affected the motor's performance. Explain, in terms of the magnetic field created by the coil and the added weight of the extra wire, why the fastest armature might not be the one with the most turns. Discuss other factors that could have affected your results, such as how well balanced each coil was, how close the coil was to the magnet, and the charge left in the battery.
Bibliography and Further Reading
External resources used as background for this project:
- How Electric Motors Work — HowStuffWorks
- Science Toys — Electricity
- Hila Science Camp — Magnet Motor
These are external links maintained by other sites and are not controlled by MiniScience; some older links may have moved or gone offline.
If you do not have this kit or need extra magnet wire, magnets or battery holders to complete your project, you can order them online. Order early so you can save on shipping charges. Check price and availability at the secure online store.
Secure Online Store
Order Now
Magnet Motor Kit — Part# MMK
Product URL:
https://shop.miniscience.com/MMK
MiniScience.com
1059 Main Avenue
Clifton, New Jersey 07011
Tel: (973) 777-3113
Email: info@MiniScience.com
Try the Interactive Lab
Magnet Motor Kit — Free Interactive Online Lab
Build the motor, adjust the setup and experiment with the science right in your browser — no kit required.
Lab URL:
https://freescienceproject.com/lab/mmk/