
Simple Electric Circuit Kit
KITSEC
Introduction
This page contains instructions for building a simple electric circuit and using it for science experiments. All information is based on the materials that come in the MiniScience Simple Electric Circuit Kit. If you don't have this kit, you can order one online.
The Simple Electric Circuit will help you to learn the basic concepts of electricity and electrical circuits. You will build and experience a light circuit powered by a battery and controlled by a switch. You will also learn about electrical conductors and insulators.
You may use your kit in connection with your science project, or you may just try it as an educational activity or a technology project. If you are doing a science project, you will need additional materials to complete your project.
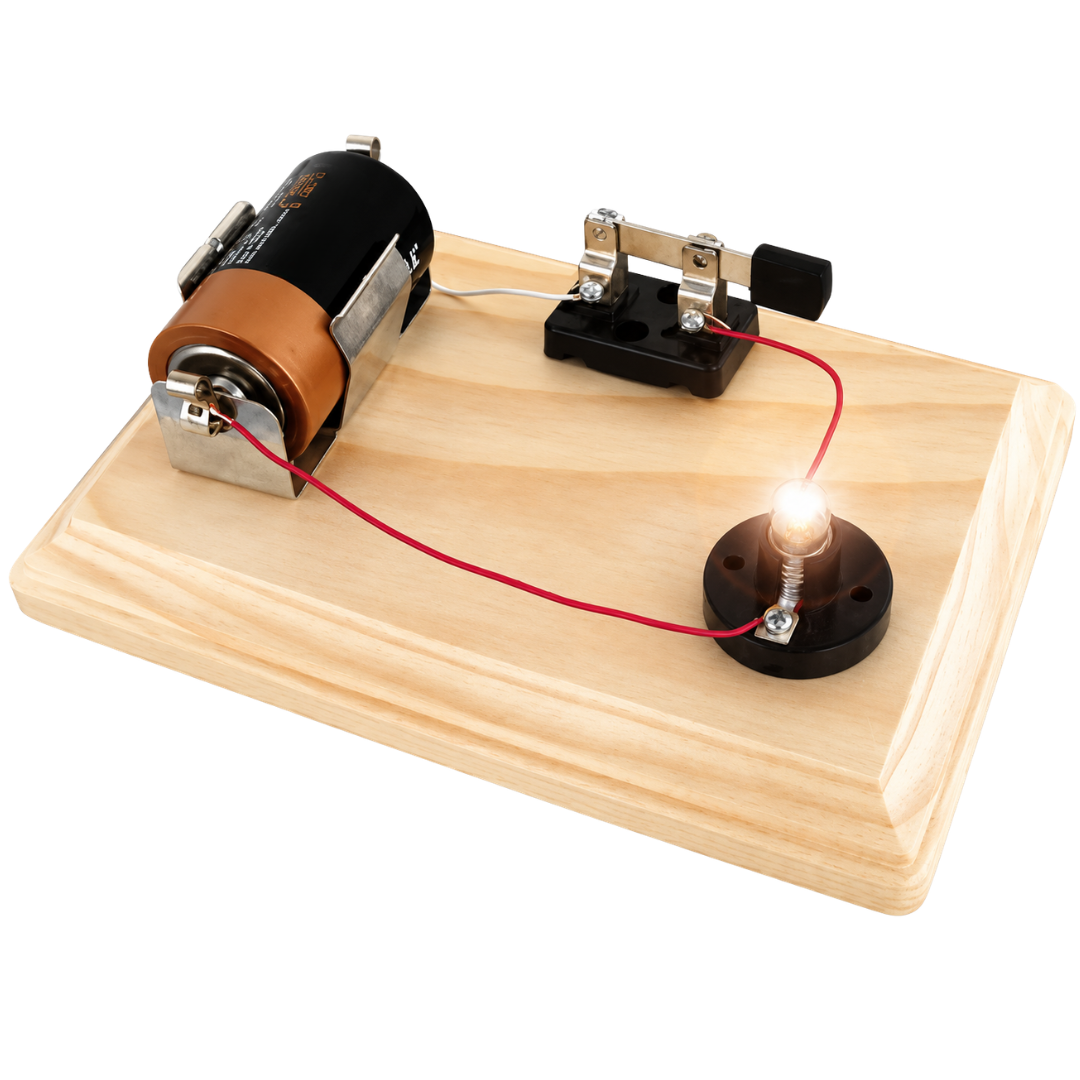
With this project students can explore:
- Simple electric circuits and the basic concepts of electricity.
- How a power source, a resistor and a switch are connected in series.
- The difference between an open circuit and a closed circuit.
- How electrical energy is converted into light and into heat.
- Which materials around us are conductors and which ones are insulators.
- Electrical safety and the role of insulation.
Items Needed
Before starting, verify the content of your kit against the list below.
- Wooden base to mount the circuit
- Two light bulbs (1.2 volt)
- One lamp holder
- One battery holder (for a D size battery)
- One simple switch (known as a knife switch)
- Screws used to mount the switch and the lamp holder
- Insulated solid copper wire (gauge 22)
- A screwdriver and a pair of scissors (not included)
- A glass thermometer, a clock showing seconds and black electrical tape, for Experiment 1 (not included)
Requires one D size battery (not included). Adult supervision is required (but not included!).
A Science Fair Project
The Simple Electric Circuit Kit may be used for a science project, technology project, display project, or an engineering project for your science fair. Your completed project will also be an educational tool for yourself and your classmates who need to understand electric circuits, the conversion of electrical energy to light and heat, and the difference between conductors and insulators.
What Is a Simple Electric Circuit?
A simple electric circuit is a circuit including a power source (battery), a resistor (light bulb) and a switch connected to each other in series. This means that wires connect the battery to the switch, the switch to the light bulb, and the light bulb back to the other end of the battery.
Connections of wires to the battery holder, the switch and the lamp base are usually done using screws or clips. You can use household tools such as a pair of scissors to cut the wire and remove the insulation from the contact points. You will also need a D size battery to power your circuit.
Assembly Procedure
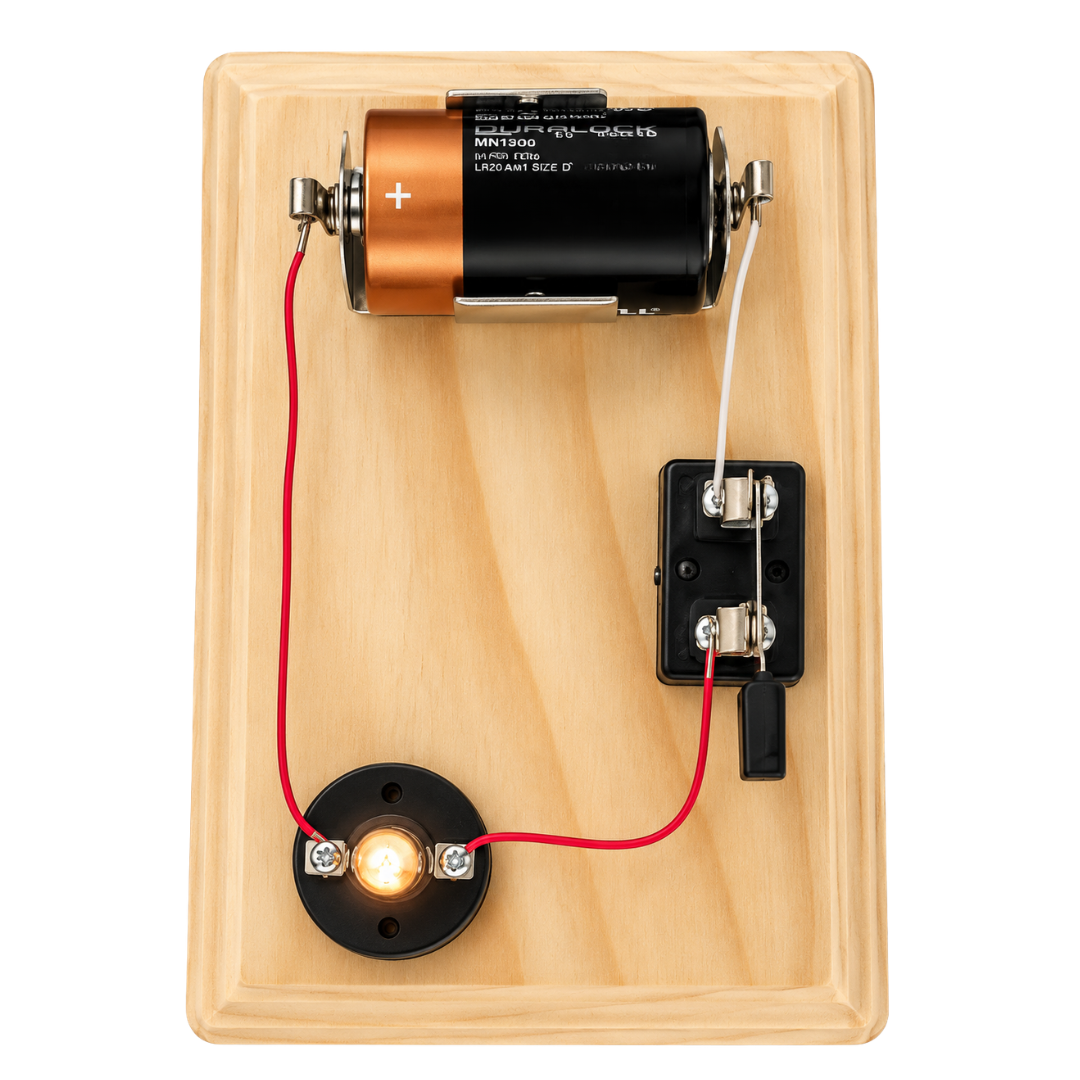
Use the picture beside to see how you must mount the components on the board.
- Use the small mounting screws to mount the battery holder, the switch and the lamp holder in the appropriate places on the board. A screwdriver and the assistance of an expert adult may be required.
- Loosen the contact screws (not the mounting screws) on the lamp holder and on the switch to make them ready for connecting the wires.
- Cut 3 pieces of wire (any color) to 7", 5" and 4".
- Remove the insulation from 1/2 inch of each end of the wires. To do that, first make a cut on the plastic insulation all around the wire, then pull the insulation off.
- Use the 7" long wire to connect the battery holder to one of the contact screws on the lamp holder.
- Use the 5" long wire to connect the remaining contact screw of the lamp holder to one of the screws on the switch.
- Use the 4" long wire to connect the remaining screw on the switch to the remaining clip of the battery holder.
Making the Connections
The picture beside shows how you connect and secure the wire to the battery holder clips. Simply push the spring, insert the wire and then release the spring. Handle the clips with care, because they may come off with excess force.
To connect the wires to the screws on the lamp holder or the switch, first bend the end of the wire into a U shape, then hook it under the screw and tighten the screw.
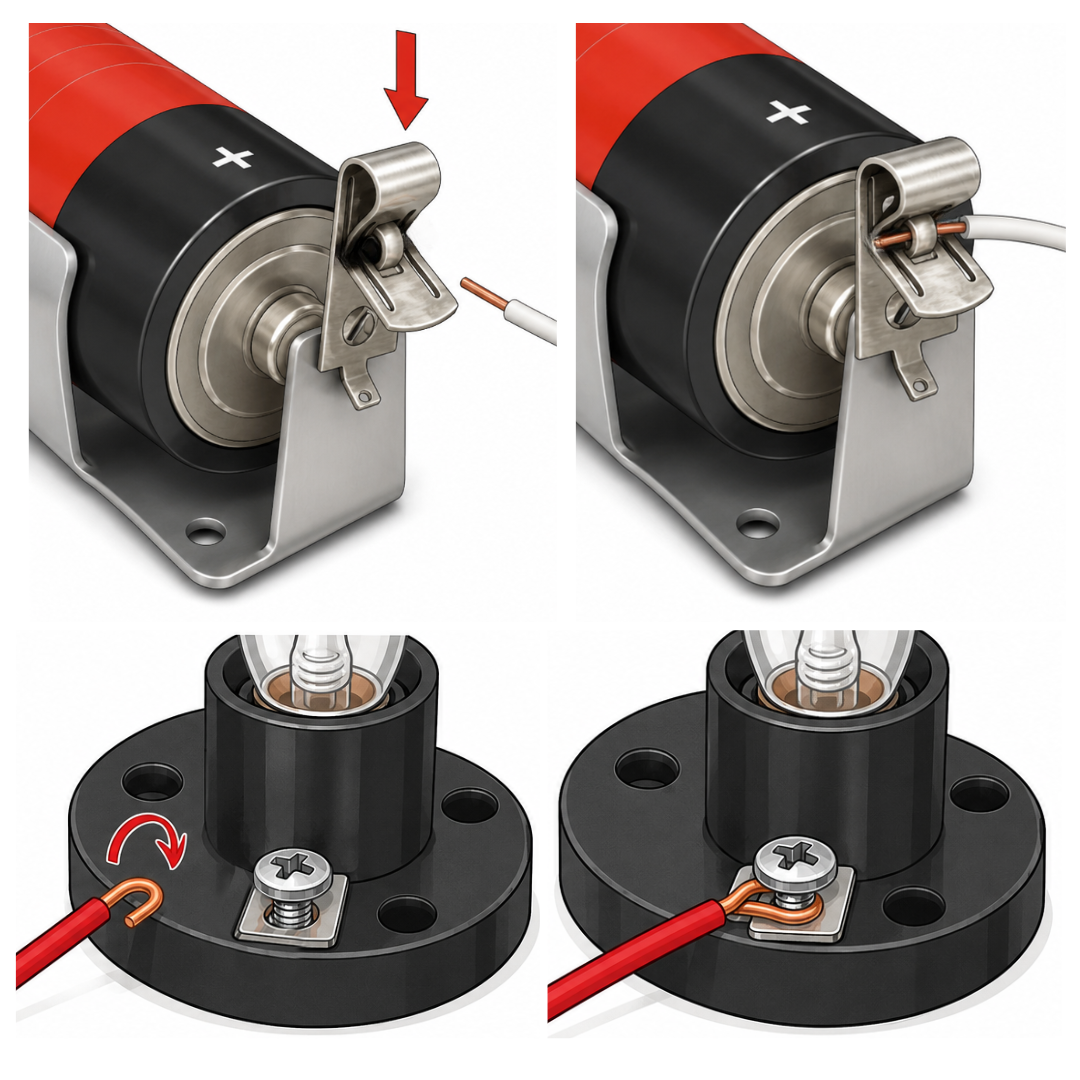
Warning: 1. No electrical contact will be made if you have not removed the insulation from the ends of the wire. 2. Do not use flame to remove the insulation. Doing this is dangerous and will blacken the ends of the wire.
Test Your Circuit
Insert the battery, screw a light bulb into the lamp holder and close the switch. The light bulb must light up. If it does not, check all the contacts and try again. You may also need to check the battery and the light bulb.
Replacement and Extra Parts
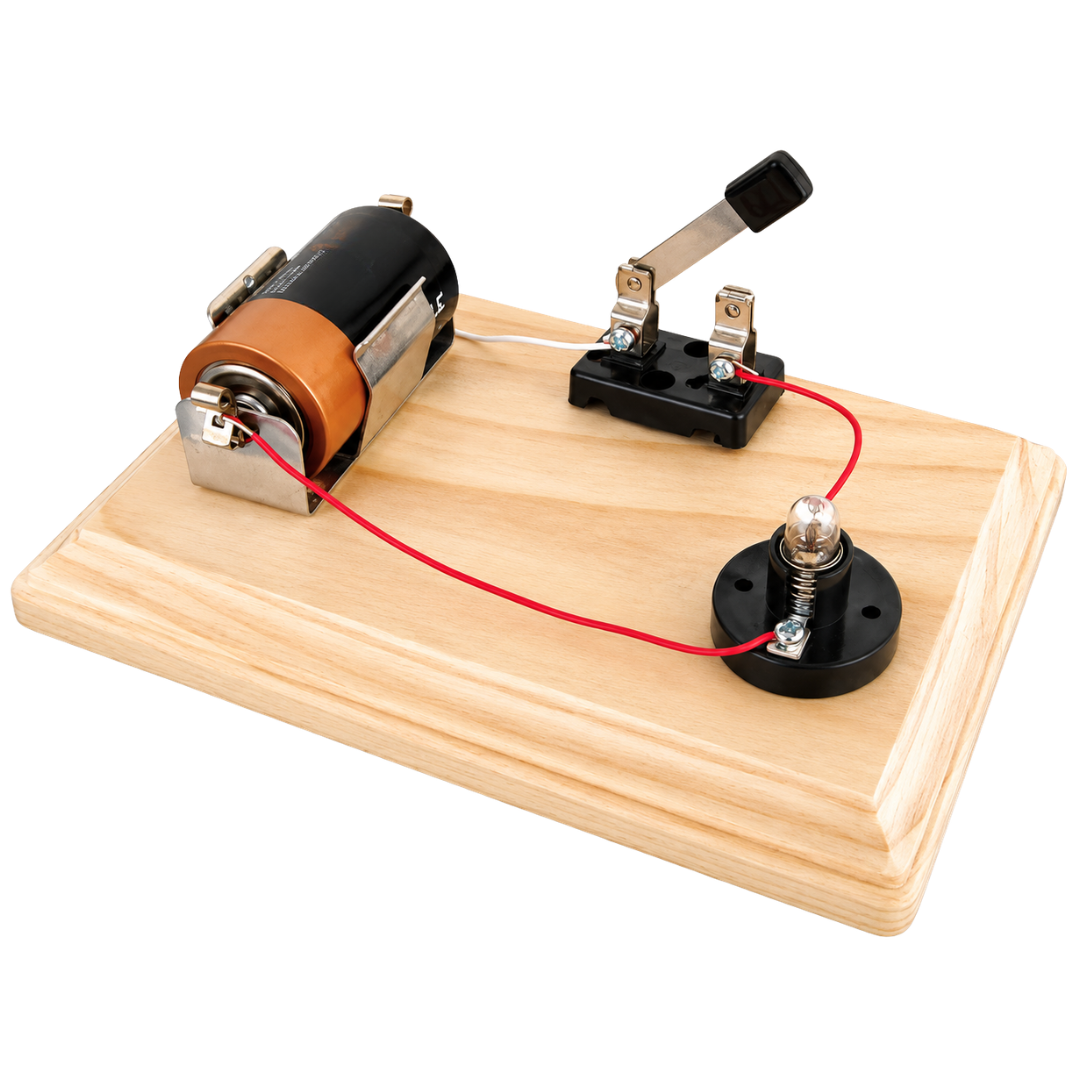
Light bulbs burn out and small parts get lost, especially in a classroom. Each component of the circuit is also sold separately, so you can replace a single piece instead of buying a whole new kit. Extra bulbs and switches are also useful if your science project needs to test more than one circuit at a time.
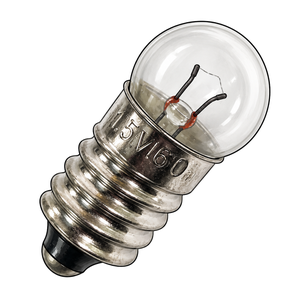
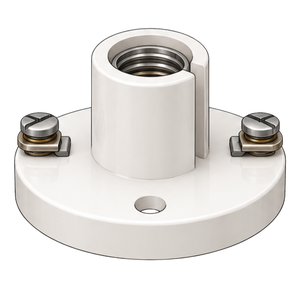
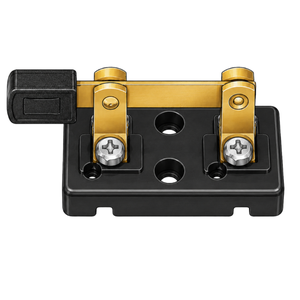
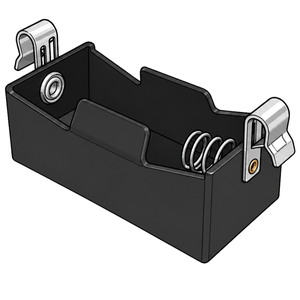
Note: the D size battery is not included with the kit and is not sold with these parts. You can find one at any grocery or hardware store.
Opportunities for Science Projects
You may use your kit in relation to many different science projects. The construction of a simple electric circuit by itself may be used as a science project for many different grades. You may also use some color paper to make a nice lamp shade for it and use it as your night light. Other students may need to use their completed circuit to do further research for their science project. Two common project ideas that use this kit are:
- Can electricity create heat? To do this project you will also need a thermometer to show that the light bulb is getting hot.
- Identify conductors and insulators around you. It is important to know what materials are conductive and what materials are not. The test is simple: open the switch and place the object between the poles of the switch. If the light comes on, then the object is conductive. You may try this with metals (coins, paper clips, nails, etc.) and non-metals (glass, plastic, stone, wood, etc.).
These two experiments are described below.
Science Project
Research question 1: Can electrical energy be converted into heat?
Sample hypothesis 1: I hypothesize that the temperature measured at the light bulb will rise while the circuit is closed, because part of the electrical energy is converted into heat.
Research question 2: What materials are conductors of electricity?
Sample hypothesis 2: I hypothesize that all metal objects will conduct electricity and close the circuit, while non-metals such as glass, rubber, wood and plastic will act as insulators.
Experiment 1 (Observation and Reporting) — Can Electricity Create Heat?
Introduction: Electricity and heat are two different types of energy. In physics we learn that energy cannot be destroyed; it can only be converted to other types of energy. In this project we intend to show that electrical energy can be converted to heat. For this experiment you will use your simple electric circuit, a glass thermometer and a clock that can show seconds.
Procedure:
- Make sure the switch is open and the light is off.
- Place the bulb of a glass thermometer on top of your light bulb and cover both with black electrical tape so that the light cannot leak out.
- Let this sit for 10 minutes to make sure that everything is at room temperature.
- Record the temperature shown on the thermometer, set your clock and turn on the switch on the top of the hour.
- Read and record the temperature every 60 seconds (one minute).
Record your readings in the table below:
| Minutes | Temperature |
|---|---|
| 0 | |
| 1 | |
| 2 | |
| 3 | |
| 4 |
Sample data table (Values are not real):
| Minutes | Temperature |
|---|---|
| 0 | 22 °C / 71.6 °F |
| 1 | 24 °C / 75.2 °F |
| 2 | 27 °C / 80.6 °F |
| 3 | 29 °C / 84.2 °F |
| 4 | 30 °C / 86 °F |
Experiment 2 (Observation and Reporting) — What Materials Are Conductors of Electricity?
Introduction: By learning about conductors and insulators we can keep ourselves and our electrical equipment safe. Every year thousands of children and adults around the world are electrocuted because they did not use proper insulation while in contact with electrical wires or equipment. So much loss of life is a clear signal that everyone must learn about electricity and how to safeguard against it by using insulators. This experiment is a fundamental step toward such education.
Procedure: Make sure the switch in your simple electric circuit is open and the light is off. Then place different objects between the poles of the switch, one at a time. If placing the object between the poles of the switch closes the circuit and the light bulb turns on, then the object is conductive. If the light does not come on, then the object is an insulator. Some of the objects you may try are: coins, nails, gold and silver pieces, paper clips, safety pins, a pencil and the pencil's lead, rubber, wood, plastics, glass and aluminum foil.
Record your results in the table below:
| Material | Conductivity |
|---|---|
| Iron nail | Conductive |
| Rubber eraser | Insulator |
| Coin (US Quarter) | |
| Glass | |
| .... |
Warning: The voltage (electrical power) of a battery, also known as a dry cell, is usually about 1.5 volts. When a material is an insulator for 1.5 volts, it may be conductive for higher voltages. Even air is conductive for high voltages. You must be more careful as you start experimenting with higher voltages in the future.
Why Don't Birds Get Killed When They Sit on High Voltage Electrical Cables?
This is a common question for those who know that most high voltage electrical cables have no insulation. The answer is simple. High voltage electricity can kill if it passes through your body. When birds sit on a power cable, the electrical current cannot pass through their body because no part of their body is touching the ground or any other wire. By the same token, someone wearing thick rubber shoes may touch a 110 volt electrical cable with one hand and stay safe; however, the same person may get electrocuted if they are touching a moist concrete wall or a water pipe with their other hand. For very high voltages, such as 6000 volts, no insulation can protect us and we must stay at least 5 feet away from such high voltage cables. That is why such cables don't have any insulation on them.
Analysis and Reporting
Review the temperatures you recorded in the first data table and discuss whether the light bulb became warmer while the circuit was closed. Explain how the electrical energy from the battery was converted into light and into heat. Discuss the other factors that could have affected your results, such as the room temperature, how well the thermometer was in contact with the bulb, or the charge left in the battery.
Then review your conductivity table and describe what the conductive materials have in common and what the insulators have in common. Explain how this knowledge is used to make electrical wires, tools and appliances safe.
Make a Graph
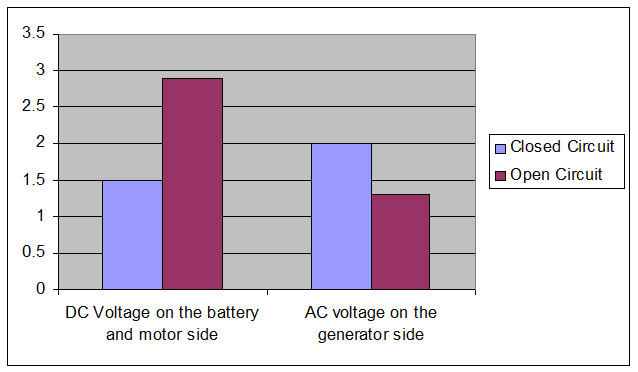
Use your data/results table to draw a graph, or create one like this in Excel. For Experiment 1, make one bar or one point for each minute so you can visually compare how the temperature changed while the light was on.
If you do not have this kit or the materials to complete your project, you can buy them online. Order early so you can save on shipping charges. Check price and availability at the secure online store.
Secure Online Store
Order Now
Simple Electric Circuit Kit — Part# KITSEC
Product URL:
https://shop.miniscience.com/KITSEC
MiniScience.com
1059 Main Avenue
Clifton, New Jersey 07011
Tel: (973) 777-3113
Email: info@MiniScience.com
Try the Interactive Lab
Simple Electric Circuit Kit — Free Interactive Online Lab
Wire the circuit, throw the switch and experiment with the science right in your browser — no kit required.
Lab URL:
https://freescienceproject.com/lab/kitsec/