
Air Motor Car Kit (Car Propeller Kit)
CAR_PROP
Introduction
This page contains instructions for building a model car driven by air propulsion and using it for science experiments. All information is based on the materials that come in the MiniScience Air Motor Car Kit. If you don't have this kit, you can order one online.
Making a propeller car is a mechanical engineering challenge used as a competition for students from 5th grade up to the second year of college. It can also be used as an experimental science project to test the effect of propeller size on the speed of the car.
Students may also decorate the car or give it an aerodynamic shape in order to reduce air friction and increase the speed. All of this is possible using construction paper, glue and water based paint.
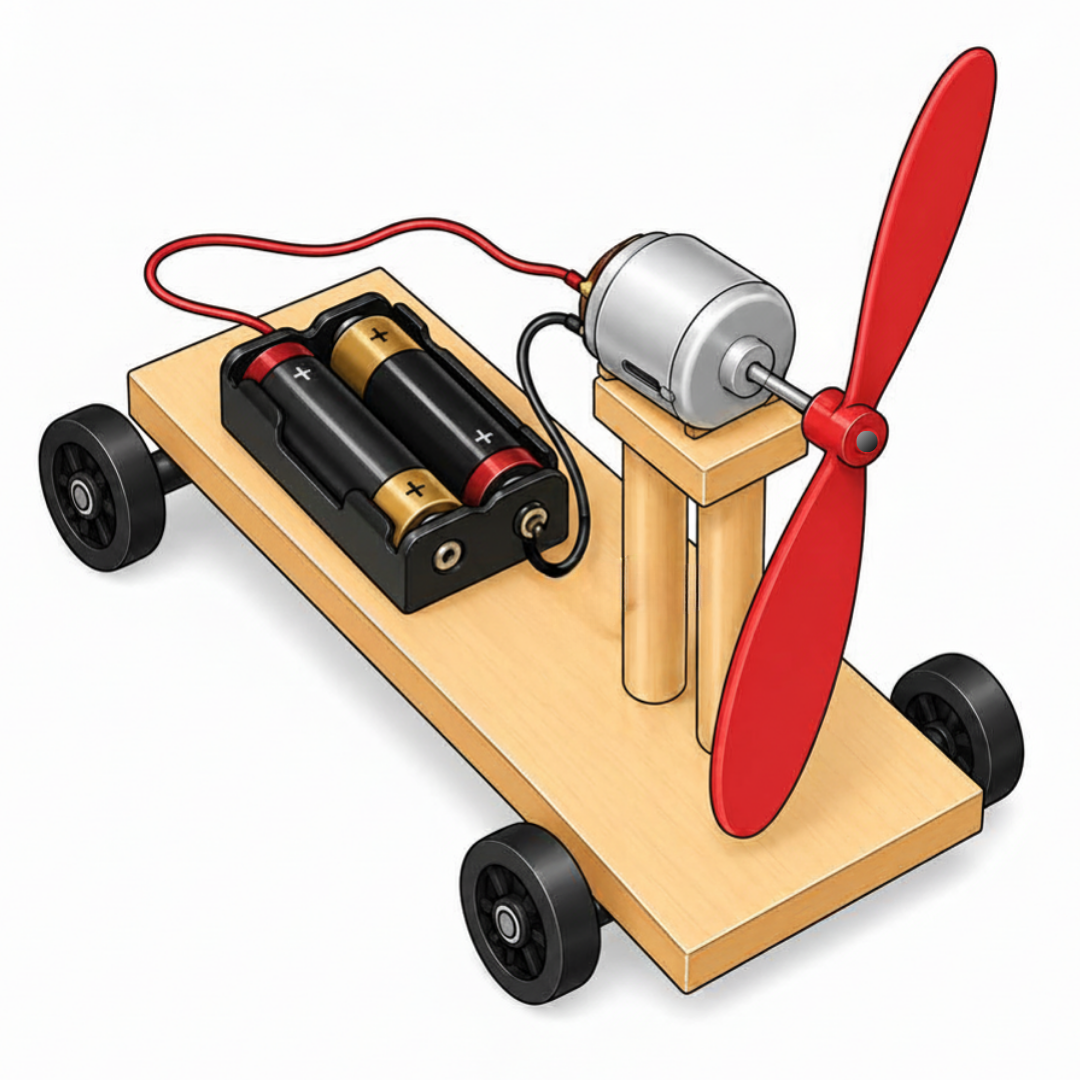
With this project students can explore:
- Simple electric circuits and the basic concepts of electricity.
- Air propulsion and how a spinning propeller pushes a vehicle forward.
- How the size of a propeller affects the speed of a vehicle.
- Friction, air resistance, and how an aerodynamic shape can increase speed.
- Using tools to assemble a chassis and using a ruler and a stopwatch to measure speed.
Items Needed
Materials Checklist
Before starting, verify the content of your kit against the list below.
- One 2" × 6" wooden board (chassis)
- Four wheels
- Two axles
- Four eye screws (axle holders)
- One plastic straw (cut into 1/2" spacers)
- Four metal washers
- Additional wood pieces and dowels for the motor stand
- Wood glue
- One plastic propeller
- One electric motor
- One plastic strap
- One 2×AA battery holder
- Connection wires
- Hook and loop tape or double sided tape
- One simple switch (optional)
- One DPDT knife switch, ref. KSWITCH22, to reverse the direction (optional)
Requires 2 AA batteries (not included).
A Science Fair Project
The air motor car kit may be used for a science project, technology project, display project, or an engineering project for your science fair. Your completed project will also be an educational tool for yourself and your classmates who need to understand simple electric circuits, air propulsion, and the conversion of electrical energy to motion.
Assembly Procedure
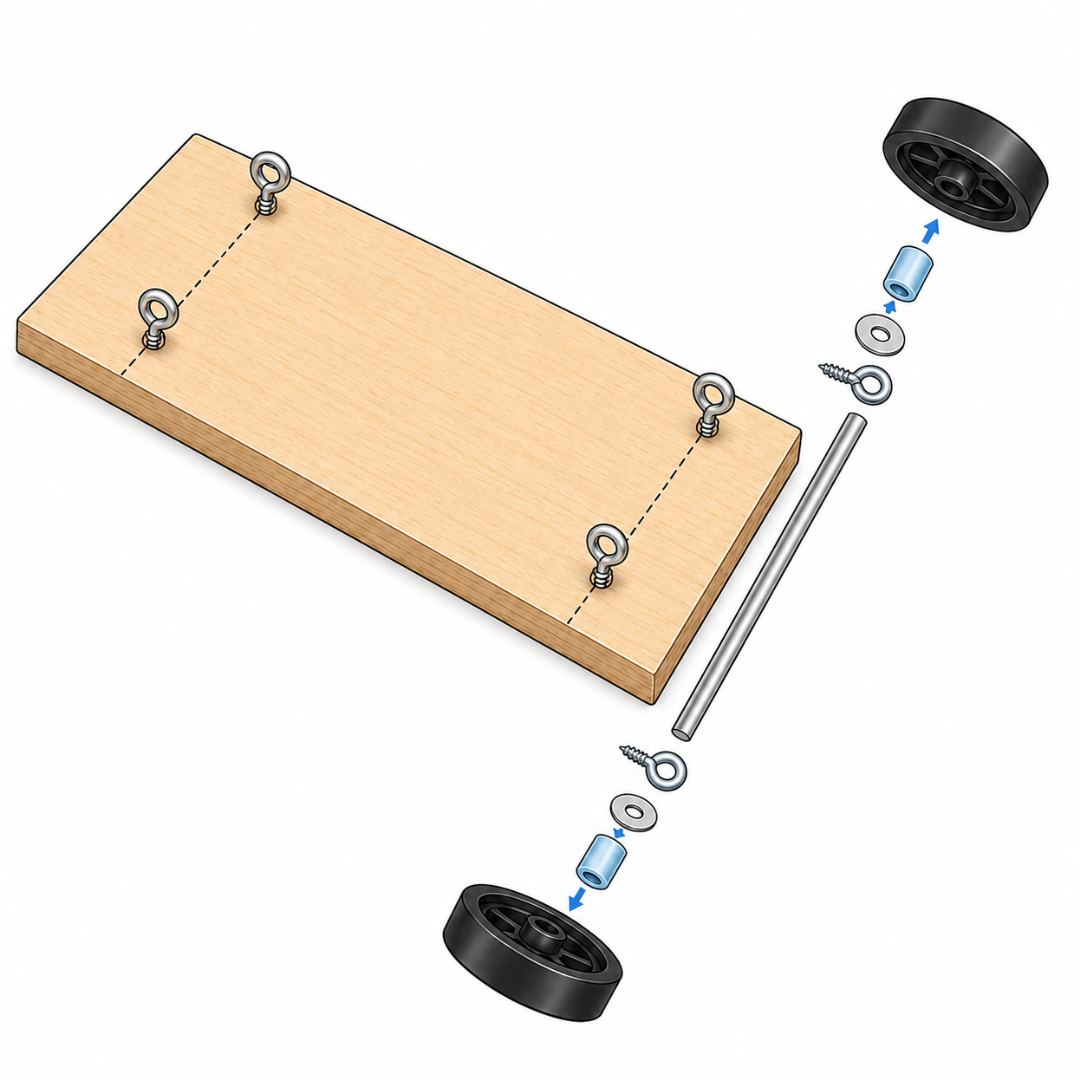
- The chassis of this car is a 2" × 6" wooden board. Mark the location of the axles by drawing a line parallel to the front side and the back side. Insert the eye screw axle holders on the axle lines about one centimeter (3/8 inch) away from each side. Make sure the screws enter at a right angle and are not slanted to one side. Cut pieces of 1/2 inch straw and keep them ready to be used as spacers in the next step. Insert the axle in one wheel. Then add a spacer and a metal washer onto it. Insert the axle in the front or back axle holders and then insert a washer, a spacer and the other wheel onto it.
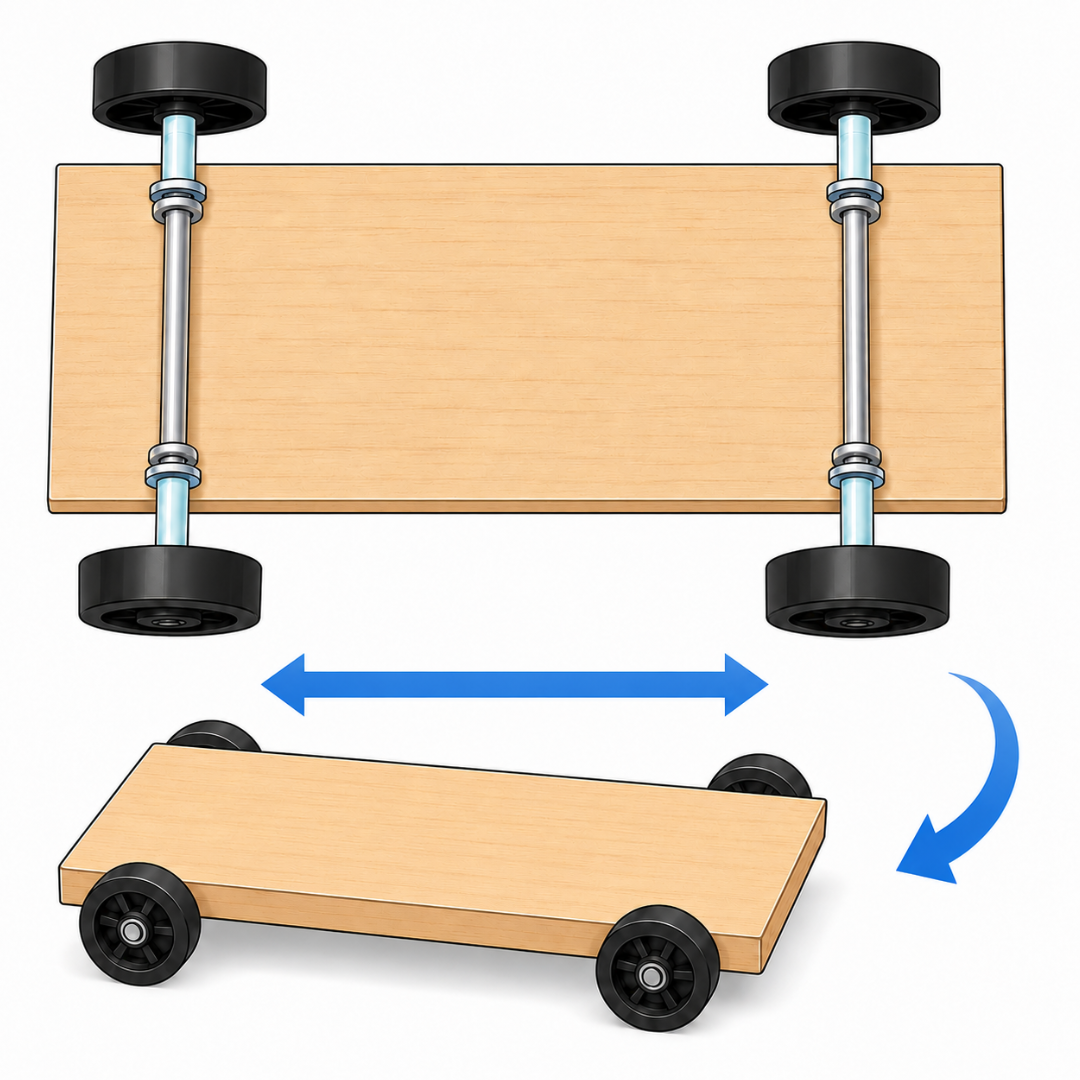
- After installing the front and back wheels and axles, test the car and make sure that it can roll smoothly. Test all the wheels and make adjustments if necessary. If the straw spacers are very long, replace them with shorter spacers. The image beside shows the underside of the car. Turn the car over and test it on a smooth flat surface.
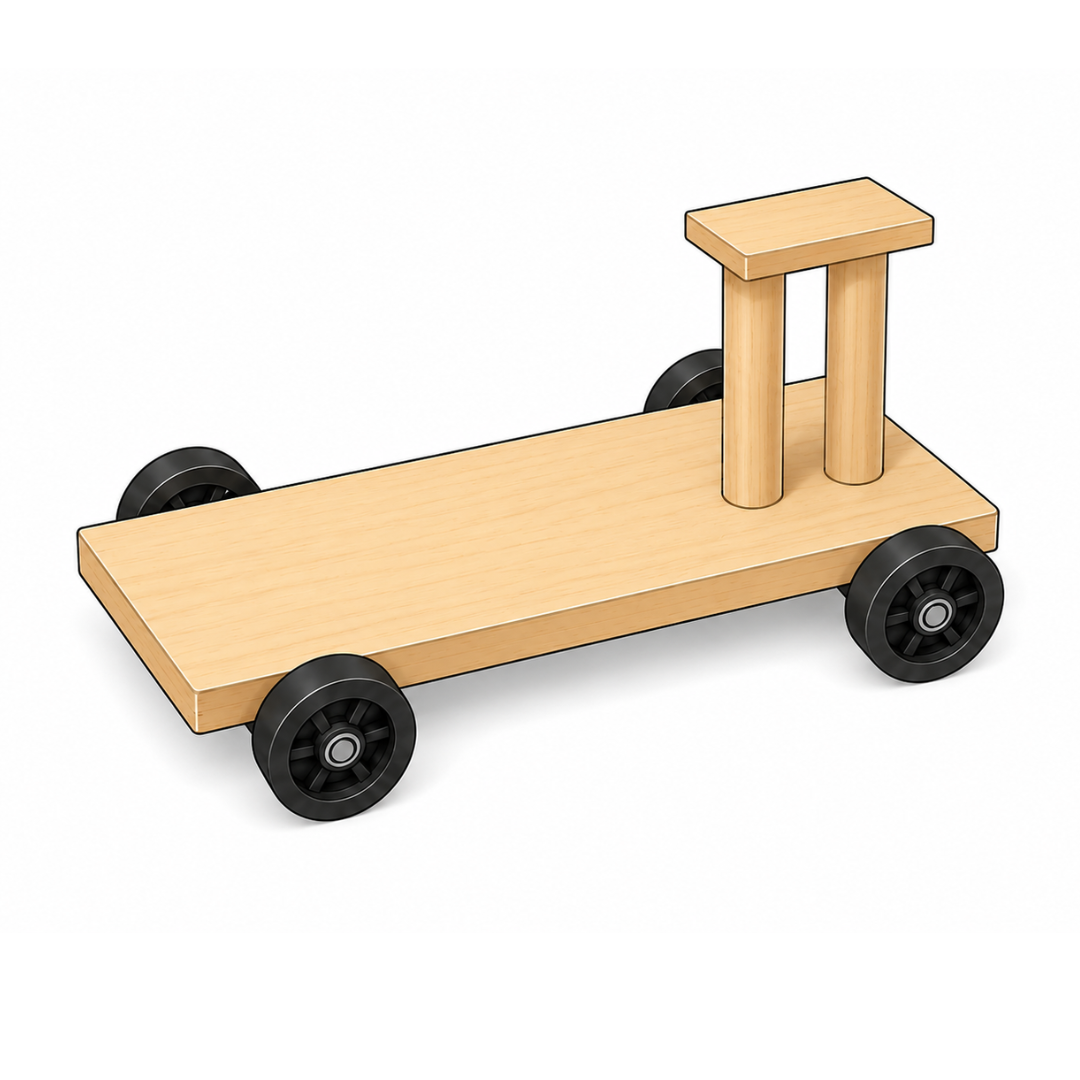
- Use additional wood pieces and wood glue to build a stand on the car similar to the one shown in the picture. Space the wood dowels or pillars about 1/4" apart. The plastic strap that will secure the motor must be able to pass through the space between the dowels. The height of the stand must be 2.5 inches (5 centimeters) or more so that the spinning propeller will not touch the car chassis. Allow the glue to dry at least for 4 hours.
- Insert the shaft of the motor into the hole at the center of the propeller.
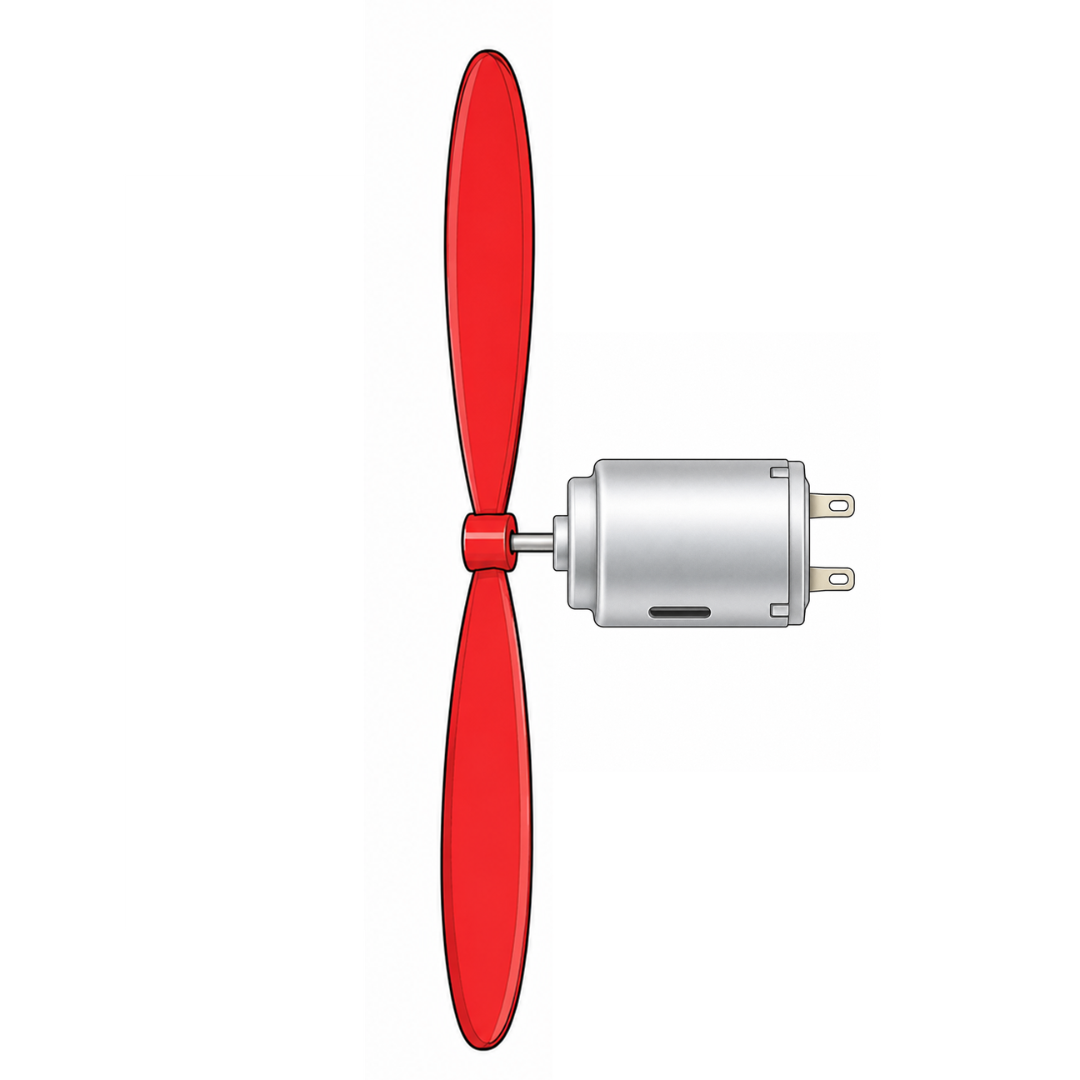
- Place the motor-propeller combination on the stand and secure it in place with the plastic strap that is included in your kit. Mount the battery holder with batteries on the car. You may use hook and loop tape or double sided tape to attach the bottom of the battery holder to the car. Locate the two metal connectors in the back of the motor. Each connector has a hole in the center that will be used to hook the connection wires.
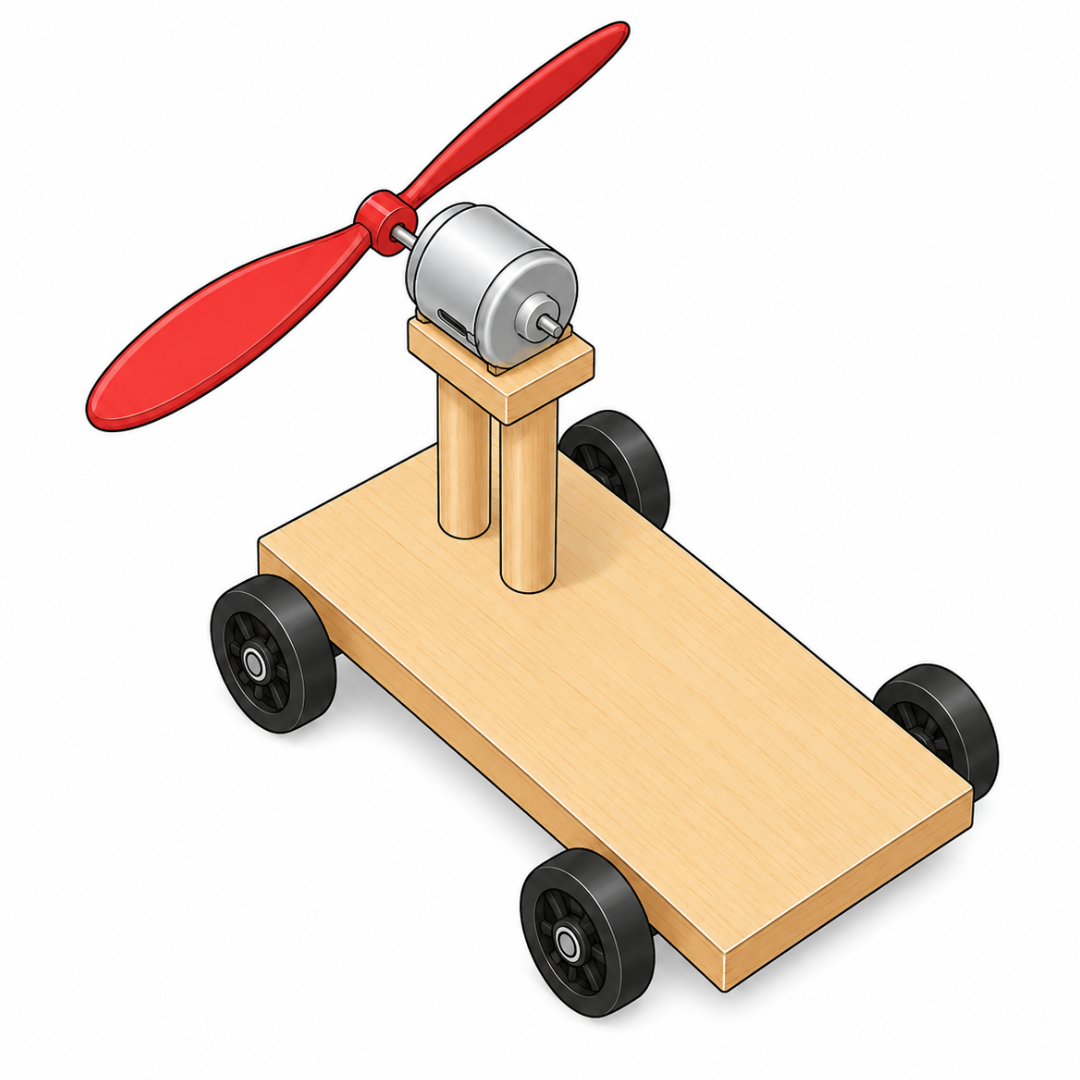
- Connect one of the wires on the battery holder to one of the connectors of the motor. Pass the wire through the hole and twist it to keep it in place securely. Place the batteries in the battery holder (if they are not there already). Hook the other wire of the battery holder to the second connector. The propeller will start turning. Place the car on a flat and smooth surface so that the car can move.
If the car moves backward, you can change the turning direction of the propeller so that the car can move forward. To change the turning direction you must switch the position of the two wires in the back of the motor.
Simple Electric Circuit
The battery and the electric motor used in this project form a simple electric circuit. Connections are possible in many different ways. If you need to install a switch for your car, you can decide on the location of the switch as long as it does not block the movement of the propeller.
In the simplest form, you connect the two wires of the battery holder directly to the electric contacts at the back of the electric motor.

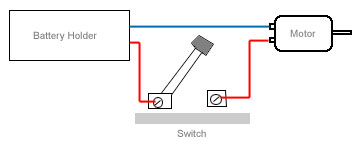
In a standard design you will use one battery holder, one switch and one electric motor. One wire from the battery holder connects to the electric motor directly. The other connects to the switch, and then another wire from the switch connects to the electric motor.
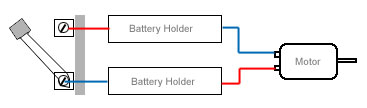
In a more complex design you may use two battery holders and install the switch between the two battery holders.
Reversing the Direction with a DPDT Knife Switch
If you want to change the direction of the car without unhooking and swapping the wires every time, use a double pole double throw (DPDT) knife switch, reference KSWITCH22. This is the connection used to reverse the polarity that reaches the motor.
A DPDT knife switch has six terminals arranged in two rows of three. Wire it like this:
- Connect the positive wire coming from the battery holders to the center terminal of one row.
- Connect the negative wire coming from the battery holders to the center terminal of the other row.
- Cross-connect the outer terminals to the motor: the two terminals on one end go to the motor contacts one way, and the two terminals on the opposite end go to the same motor contacts the other way around.
Now, depending on which side the knife of the switch is thrown, electricity is sent to the motor one way or the other. This reverses the polarity, so the propeller spins in the opposite direction and the car moves forward or backward. Leaving the knife in the middle, touching neither side, turns the motor off.

Get the KSWITCH22:
https://shop.miniscience.com/KSWITCH22
Note: The electric motor is able to spin in two different directions. You can reverse the direction of spinning by switching around the wires connected to the motor, or automatically with the DPDT knife switch shown above.
Science Project
Research question: How does the size of the propeller affect the speed of the car?
Sample hypothesis 1: I hypothesize that the size of the propeller has no effect on the speed of the car.
Sample hypothesis 2: I hypothesize that a larger propeller will make the car move faster than a smaller propeller.
Experiment (Observation and Reporting)
- Find a smooth, flat and level surface such as a long hallway floor. Mark a start line and a finish line 3 meters (about 10 feet) apart.
- Mount the smallest propeller on the motor. Place the car behind the start line, connect the wires, and release the car.
- Use a stopwatch to measure the time the car takes to travel from the start line to the finish line. Record the time.
- Repeat the same trial three times with the same propeller and calculate the average time.
- Replace the propeller with a larger one and repeat steps 2 to 4. Use the same batteries for every trial so the only thing that changes is the propeller.
- Calculate the speed for each propeller: speed = distance ÷ average time.
Record your readings in the table below:
| Propeller diameter | Average time for 3 m (seconds) | Speed (m/s) |
|---|---|---|
| Small | ||
| Medium | ||
| Large |
Sample data table (Values are not real):
| Propeller diameter | Average time for 3 m (seconds) | Speed (m/s) |
|---|---|---|
| Small (3") | 7.5 | 0.40 |
| Medium (4") | 5.0 | 0.60 |
| Large (5") | 4.3 | 0.70 |
Need extra propellers of different sizes for your experiment? Shop propellers at MiniScience.
Shop propellers:
https://shop.miniscience.com/propeller
Analysis and Reporting
Review the times and speeds you recorded in the data table and discuss whether the propeller size changed the speed of the car. Consider why a larger propeller can move more air, and also why a propeller that is too large may slow the motor down. Discuss the other factors that could have affected your results, such as friction in the wheels, the weight of the car, or the charge left in the batteries.
Make a Graph
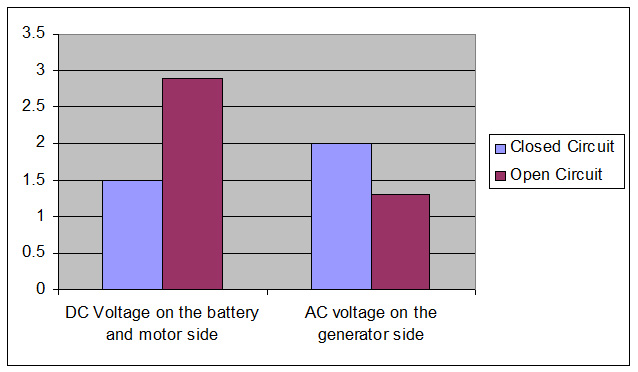
Use your data/results table to draw a graph, or create one like this in Excel. Make one bar for each propeller size so you can visually compare the speed of the car with each propeller.
If you do not have this kit, you can order it now. It is available both as a single pack and as a class pack. Check price and availability at the secure online store.
Secure Online Store
Order Now
Air Motor Car Kit (Car Propeller Kit) — Part# CAR_PROP
Product URL:
https://shop.miniscience.com/CAR_PROP
MiniScience.com
1059 Main Avenue
Clifton, New Jersey 07011
Tel: (973) 777-3113
Email: info@MiniScience.com
Try the Interactive Lab
Air Motor Car Kit — Free Interactive Online Lab
Assemble the car, run the propeller and experiment with the science right in your browser — no kit required.
Lab URL:
https://freescienceproject.com/lab/carprop/