|
Preparing
Nutrient Agar Plates
This is a sample recipe for making nutrient agar at home. Step 1: Making a nutrient broth This step is very similar to making a nutritious soup that you usually do at home. The ratio of materials are almost the same. The only difference is that final broth must be clear and fat free. Start with these materials:
Cut each chicken breast to a few smaller pieces. Cut potato in 4 pieces. Cut the mushroom in half. Add them all to water and cook them for 2 hours. At the end you must separate the clear broth for the next step. If the broth is not clear, filter it any way you can. Step 2: Making agar gel When your clear nutrient broth is ready, you must gradually add agar powder to that while heating and stirring. Continues stirring is specially important because without that agar particles will get to the bottom and burn. You will need about 10 grams agar for each liter (or each quart) of the broth. Allow the mixture to boil about one minute after all the agar is fully dissolved. Then stop the heat. Cover the agar to protect it against dust and let it cool down to a safe hot temperature. This is a temperature that feels hot, but does not burn you. At this time you can pour the gel into the dishes. Step 3: Pouring agar into the petri dishes Place the petri dishes in a row on a table with the lids on. If you have been using a beaker to prepare the gel, you may use the same beaker to pour the gel. Otherwise use a soup ladle to transfer hot liquid gel to the dishes. Remove the lids of petri dishes one at a time and pour enough liquid to cover the bottom of the dish. Place the lids back immediately after you pour the gel. Let the gels to cool down and solidify. To expedite the formation of gels you may place the dishes in a refrigerator. Step 4: Dry agar plates Since you are pouring hot liquid in dishes, lots of condensation will accumulate in them that must be aseptically removed. Before you start please look at the following diagrams to make sure you have placed your plates right side up in the refrigerator.
Find a countertop that is free of drafts and insects (ants, flies, roaches, etc.) which like to walk around on the agar surfaces with their dirty feet. You need a nearly sterile surface. Here's a cheapie way to make one. Consider a fresh roll of paper towels. The paper inside is essentially sterile due to its hot, untouched, manufacturing process. Touching only the edges or the outside surface, unroll a length of paper towels, and lay these out on your countertop such that the inner surface is up. Voila: a sterile surface! Place a prop such as a pencil down on the paper towel near the end. Next open one plate at a time and set them one on the other as shown in the diagram below. Their openings MUST be pointing downwards so that dust will not settle in them. (If the covers have lots of moisture, fling off the excess by holding the cover tightly and giving it a quick flick of the wrist. Don't do this with the agar-filled bottoms unless you want to clean up a mess!)
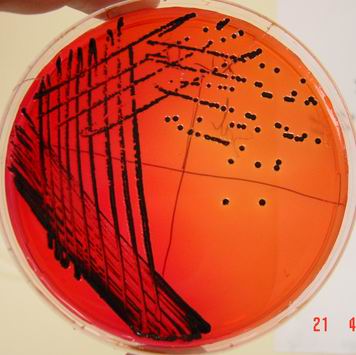
When you no longer see liquid on the inside of the covers and on the agar surfaces, put the plates together and stack them right side up. (This prevents dust from falling into the joint. Were the plates stacked upside down, any dust that falls into the joint would then slip inside and, when the plate is turned over to use, would then fall onto the agar surface. Mold will most certainly grow. Step 5: Inoculate bacteria on dishes Use an inoculating loop or a sterile cotton swab to spread one drop of polluted water or bacteria culture on the surface of a nutrient agar plate. Put the lid back, turn it upside down and place it in an incubator at 37�C (Body temperature). Any warm cabinet or warm space may be used as an incubator. Bacteria grow much slower at room temperature. Do you know why you must place the plates upside down in an incubator? The reason is that moisture moves up, so when you place the plates upside down, the gel will remain moist and condensations do not form in the petri dish. |
||
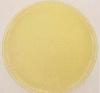
Samples
of bacteria colonies grown on nutrient agar plates
|
||